How to transfer an eSIM to a new iPhone in 2026
1. Essential preparations before transferring your eSIM
1.1 Check iPhone compatibility and iOS version
eSIM transfer between iPhones requires compatible devices and recent iOS versions. This feature greatly simplifies the operation when both devices meet the technical criteria.
To check the iOS version on your devices, follow these simple steps:
- 1. Open Settings > General > About
- 2. Look for the Software Version line
- 3. If needed, update via Settings > General > Software Update
Beware of potential limitations: a carrier-locked iPhone may prevent automatic transfer. Also, older iOS versions do not support all direct transfer functions.
It is essential to verify if your iPhone is unlocked for all carriers before starting the procedure. For detailed procedures and scenario differences, consult the Apple cellular setup guide which outlines important steps and exceptions.
1.2 Prepare devices: Bluetooth, Wi‑Fi, Apple ID, and passcode
Before starting the eSIM transfer between iPhones, enable Wi‑Fi and Bluetooth on both devices. Ideally, connect them to the same Wi‑Fi and Bluetooth network to optimize communication between the devices.
Make sure both iPhones are signed in with the same Apple ID. This authentication is crucial as the transfer uses Apple pairing to securely validate the operation.
The iPhone passcode (lock screen) of the old device must be accessible. It may be requested to confirm the transfer and ensure the security of your data.
Always keep both devices side by side and do not leave the Bluetooth/Wi‑Fi range during the operation. Carriers emphasize proximity and continuous connection to successfully complete the transfer.
This careful preparation is detailed in the carrier technical guides highlighting the importance of these prerequisites.
1.3 Backups, information to have, and precautions before proceeding
Perform an iCloud or local backup of your old iPhone as a precaution. This step protects your data in case of issues during the transfer.
If possible, note the IMEI and ICCID/IMSI of your line. This technical information is useful if you need carrier intervention or QR code regeneration.
Also prepare your carrier customer credentials for potential assistance. Be aware that the automatic transfer will deactivate the eSIM on the old device once activation is successful on the new one.
| Information to prepare | Purpose |
|---|---|
| IMEI of both iPhones | Device identification |
| ICCID/IMSI of the line | Carrier technical support |
| Customer credentials | QR code regeneration if needed |
| eSIM PIN code | Final activation |
Prepare a plan B with the carrier QR code or activation via their app if the transfer fails. This preventive approach is recommended by Apple in its official documentation.
Find the best eSIM for your trip
Compare available plans right now and travel with peace of mind!
Choose the best eSIM card2. eSIM transfer iPhone → iPhone: step-by-step guide (recommended method)
2.1 Detailed steps for quick transfer from Settings (Apple procedure)
The “transfer from a nearby iPhone” procedure is the simplest method when supported. Here are the detailed steps for eSIM transfer between iPhones:
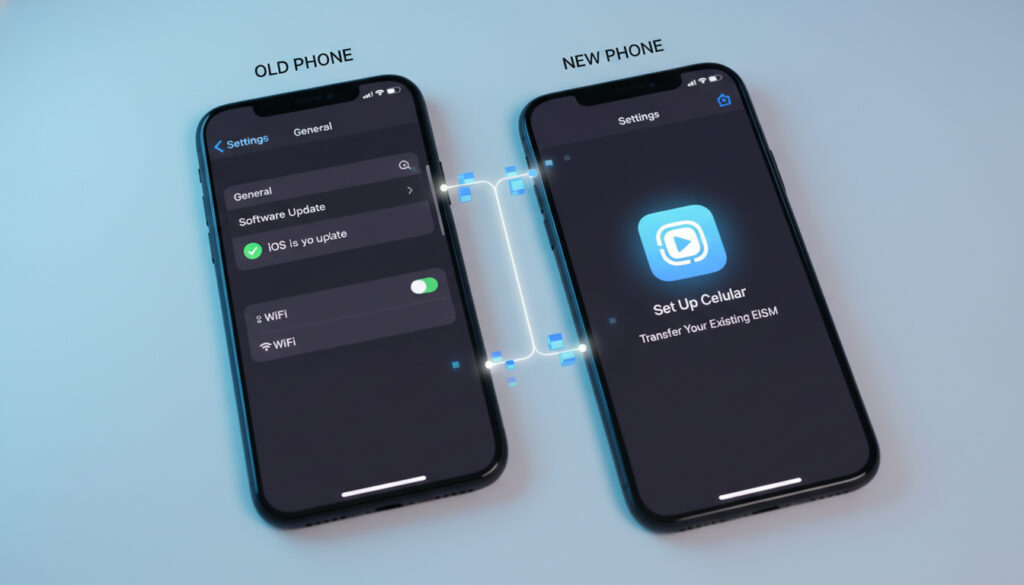
- 1. On the new iPhone, go to Settings > Cellular > Add Cellular Plan
- 2. Select the option Transfer from a Nearby iPhone
- 3. On the old iPhone, accept the transfer request when prompted
- 4. Enter the 6-digit verification code displayed on the new iPhone
- 5. Follow the instructions: accept confirmation and enter the iPhone passcode if requested
- 6. Wait for activation until you see “Cellular Plan Ready” or network bars
The eSIM on the old iPhone is automatically deactivated once the transfer succeeds. This deactivation prevents unauthorized multiple uses.
This procedure is standardized and documented by carriers in their iPhone→iPhone tutorials confirming this sequence.
2.2 Practical tips to succeed on the first try (proximity, waiting, confirmations)
To minimize errors and successfully complete the eSIM transfer between iPhones on the first attempt, follow these practical tips:
Positioning and connectivity:
- Place both iPhones side by side and maintain this proximity
- Never turn off Wi‑Fi or Bluetooth during the process
- Block notifications to avoid interruptions
Patience and confirmations:
- Activation can take 5 to 10 minutes depending on the carrier
- If the new iPhone does not show the cellular plan, restart both devices
- A physical confirmation (double-click side button) may be required
Post-transfer checks:
- Verify that the old eSIM is marked as transferred/deleted
- Test calls, SMS, and mobile data management
- Set the default line if you have multiple profiles
These best practices are recommended by carrier feedback and technical guides to avoid prolonged interruptions, as confirmed by the specialized tutorials.
2.3 What to do if the transfer offers multiple lines or eSIM profiles
When multiple eSIM profiles appear, carefully select the plan corresponding to the number you want to transfer. This situation often occurs with business users or travelers.
After the transfer, adjust cellular settings on the new iPhone:
- Main line: set it for regular calls and SMS
- Default line: choose it for mobile data
- Contact management: associate numbers with the correct lines
Access these settings via Settings > Cellular then Data Priority and Default Line.
If you are unsure about a profile label (e.g., “Line 1”, “Line 2”), compare the ICCID or carrier name before confirming. This check prevents transferring to the wrong line.
For users of eSIM iPhone XR and newer models, this multi-profile management is especially important as these devices support multiple simultaneous eSIMs.
Discover the best eSIM offers for your destination ✅
Compare thousands of packages in 200+ destinations
3. Alternatives, troubleshooting, and when to contact your carrier
3.1 Activation via QR code or carrier app (if transfer fails)
If the automatic eSIM transfer between iPhones fails, several alternatives are available. The carrier QR code is the most reliable and universal backup solution.
Activation procedure via QR code:
- Contact your carrier to obtain a new QR code
- On the new iPhone, go to Settings > Cellular > Add Cellular Plan
- Select Scan QR Code and point to the provided code
- Follow the activation instructions via Settings displayed
- Enter the iPhone passcode if requested to finalize
Carrier apps:
Many carriers offer their own apps to manage eSIMs. These apps often allow regenerating QR codes or directly activating the cellular plan without going through system settings.
Note: activation via QR code can take up to 24 hours depending on the carrier. Plan accordingly if you need immediate service.
Travel eSIM providers like Airalo or Saily also offer simplified activation procedures via their dedicated apps.
3.2 Common errors and quick troubleshooting solutions
The most frequent errors during eSIM transfer between iPhones have simple solutions:
“Unable to transfer” error:
- Check that both devices are on Wi‑Fi and Bluetooth networks
- Restart both iPhones and try again
- Ensure the old iPhone is not in airplane mode
Activation stuck:
- Wait an additional 10-15 minutes
- Force network search in Settings > Cellular > Network Selection
- Verify that the iOS version is compatible on both devices
eSIM profile not recognized:
- Delete the faulty profile and try again
- Contact the carrier to check your line status
- Use the carrier QR code as a backup solution
| Problem | Quick solution | Delay |
|---|---|---|
| Transfer fails | Restart + retry | 5 min |
| Slow activation | Patience + network search | 15 min |
| Corrupted profile | Delete + QR code | 30 min |
3.3 When and how to contact carrier support
Contact your carrier in these specific situations:
Urgent cases requiring intervention:
- Transfer fails after 3 attempts
- The old eSIM remains active after 24 hours
- No network signal after successful activation
- Multiple eSIM profiles cause conflicts
Information to prepare for support:
- IMEI of both iPhones
- ICCID of the concerned eSIM
- Line number and customer ID
- Detailed description of the encountered error
Most carriers offer 24/7 technical support for eSIM issues. They can regenerate the carrier QR code, reset your profile, or diagnose compatibility problems.
For travel eSIMs, providers like Ubigi or Maya offer responsive customer support via their mobile apps.
Save on your next trip with our eSIM offers ✅
Enjoy discounts up to 30% off with our exclusive promo codes
See promo codes4. Conclusion
eSIM transfer between iPhones is simple and fast when you follow the procedure recommended by Apple. The automatic transfer method via Settings is the most efficient solution, provided compatibility and device proximity prerequisites are met.
If it fails, alternatives like the carrier QR code or dedicated apps ensure successful activation. Don’t hesitate to contact your carrier if troubleshooting solutions are insufficient.
Guide Gratuit : Comment Voyager Moins Cher
Recevoir le guideFAQ

Passionate about travel and tech, I have combined these two worlds to help travelers understand the numerous options to get Internet access abroad and identify the best option for them. As a software development engineer, I put my skills at the service of simple, practical and transparent content. My goal is to give you all the keys to stay connected easily and at the best price during your trips. 🌍📲